Maintenance, Installation, Healthy Lawn
November 1, 2022When small areas of your lawn die, you can repair these bald spots by preparing the soil and planting new grass.
This process of patching grass is fairly simple – with the landscape maintenance project outlined below taking only 15 minutes. If dealing with a larger area in your lawn, it’s safe to assume that additional time will be needed.
First Things First in Patching Grass
Before you start to tackle the issue, the first step in patching grass is to figure out what went wrong in the first place. Grass can die for any number of reasons and, unless the issue is corrected sooner than later, the problem will recur and cause more disruption to your lawn.
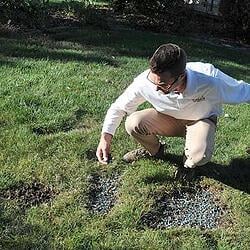
Start by thoroughly inspecting the dead grass. Look for soil compaction, shade issues, disease and insect problems, or water drainage issues. The spots featured in the lawn below were caused by improper pesticide use. More specifically, Roundup® was used to spray the dandelions and clover in the turf, subsequently killing the grass as well.
Here are the steps that were taken to fix bare spots in this lawn.
Preparing the Soil to Repair Bare Patches in Your Lawn
Step 1. Remove All the Grass in the Problem Area
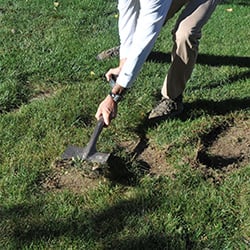
Dig up and remove the grass in the problem area. You can make the soil easier to work with by wetting it first. Then, outline the problem spot with a flat spade shovel. Enlarge the area slightly to simplify the work and to ensure the entire problem area is removed.

Using the same flat spade shovel referenced above — and potentially sharpening the edge first, as we recommend — remove the top layer of remaining turf and soil. Work from the middle outwards until the shovel hits the deep edge you created when making the border.
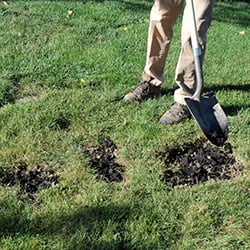
Step 2. Loosen the Soil
Turn over the soil using a spade shovel that has a rounded or pointed end. Be sure to get to about four inches deep. This breaks up soil compaction, making it easier for the roots of your new grass seeds to grow deeper.
Before you start to loosen the soil, remove any stones, roots or other plant materials that may hinder the growth of your new grass as you work.
Step 3: Amend the Soil for Healthy Growth
The health of your lawn and new grass depends on the soil where they are planted. By placing organic matter into your loosened topsoil, you can greatly improve the growing conditions for your lawn’s roots.
Enrich the soil with compost or a commercial bagged product from your local garden center. The darker the color of the soil, the more organic material and nutrients it has.
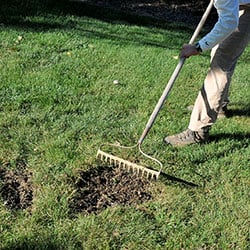
Work the organic material into the soil using the spade or garden rake.
Step 4. Level the Surface
Use your garden rake to level and create a smooth surface. In this example, seed is used, so the soil surface should be at the same level as the surrounding soil (or slightly higher to allow for settling). If using sod you purchased or transplanted from another location, the soil should be one inch lower to allow for the depth of the sod’s soil and roots.
Be sure to take care that the surface is even, with no low or high spots. This will avoid a lumpy end result and depressions that can collect water and lead to disease.
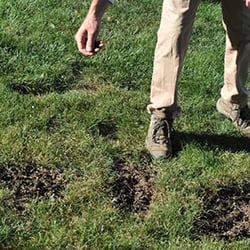
Step 5. Spread the Grass Seed
If you are patching grass with grass seed, make sure you spread it at the rate described on the seed’s packaging. In this example, the spot is seeded by hand as the area is quite small. For a larger area, you will want to use either a small hand spreader or a wheeled fertilizer spreader — and then rake a thin layer of soil over the grass seeds.
Applying a fertilizer can assist with jumpstarting the seeds growth and establishing strong roots.
In terms of the type of grass seed you select, you’ll want to pick one that matches both the type of grass currently growing in your lawn and the requirements of the area where it will grow. As a general rule of thumb, cool-season grasses that can thrive both in full sunlight and the shade are most suitable for Ohio lawns.
Step 6. Apply Mulch Covering
Cover the freshly-seeded area with a protective layer of mulch. Typical materials used for this purpose are straw, peat moss or other commercially available products such as PennMulch (shown in the photo below). Made of recycled newspaper, this product conserves moisture well and contains starter fertilizer that improves root establishment.
It’s worth noting that the actual product used is not as important as what the products do for you. Focus on products that promote the conservation of moisture, increase turf density and minimize weed seeds from finding your freshly prepared, fertile soil.
Step 7. Keep Soil Moist Until Seeds Sprout
Grass seeds that dry out will die. Once this occurs — no matter how much you water the seeds — you will have to replant them.
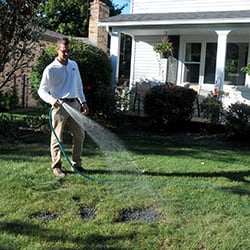
Depending on your soil conditions and the weather, you should water the area with seeds several times a day. Recognizing that this is not always possible, strive for a minimum of twice per day.
The goal is to keep the soil moist, but not so wet that it is soggy or has water collected on its surface. This will kill your seeds.
You can expect to see seedlings within four to seven days depending on the water conditions and the seed type. Your grass should be ready to be mowed once the seedlings have reached around four inches in height (or in about two weeks.)
Green Impressions has years of experience helping Northeast Ohio homeowners keep their lawn healthy and beautiful. Save time and hassle in your lawn care efforts with our services.